
Y Plan Wiring Diagram PDF: An Overview
Y Plan systems, detailed in PDF diagrams, represent a sophisticated central heating approach. These diagrams illustrate efficient heat distribution, utilizing a manifold and circulating pump.
Understanding these PDF resources is crucial for installers and homeowners alike, offering insights into system components and operational logic. They showcase a primary loop and secondary loops.
Diagrams often include symbols for TRVs, pipes, and the boiler, aiding in accurate interpretation and troubleshooting. Accessing these PDF guides ensures proper installation and maintenance.
Understanding the Y Plan System
Y Plan systems, frequently documented in detailed PDF wiring diagrams, represent a significant advancement in central heating technology. Unlike simpler setups, a Y Plan utilizes a manifold connected to both the boiler’s flow and return, creating a primary loop. This primary loop then feeds multiple secondary loops, each serving individual heating zones or radiators.
The core principle revolves around maintaining a constant flow rate through the primary loop, regardless of the demand from the secondary loops. This is achieved through a circulating pump and bypass valve, ensuring efficient heat transfer. PDF diagrams clearly illustrate this flow path, highlighting the interaction between the boiler, manifold, pump, and radiators.
Understanding this fundamental concept is vital for anyone interpreting a Y Plan wiring diagram PDF. The system’s efficiency stems from its ability to deliver heat precisely where and when it’s needed, minimizing energy waste and maximizing comfort. Proper installation, guided by these diagrams, is key to realizing these benefits.
What is a Y Plan Wiring System?
A Y Plan wiring system, comprehensively detailed in PDF wiring diagrams, is a sophisticated central heating configuration favored for larger properties or those requiring precise zonal control. It distinguishes itself through a fully pumped primary circuit, meaning a pump continuously circulates water between the boiler and a manifold, even when no heating demand exists.
This primary loop then feeds multiple secondary loops, each dedicated to a specific heating zone. PDF diagrams visually represent this arrangement, showcasing the bypass valve which maintains flow in the primary loop when all zones are satisfied. This constant circulation minimizes boiler cycling and improves efficiency.
Analyzing a Y Plan wiring diagram PDF reveals the system’s complexity, but also its advantages: improved response times, consistent temperatures, and the ability to integrate with smart heating controls. It’s a robust solution for optimized heating performance.
Benefits of Using a Y Plan System
Consulting a Y Plan wiring diagram PDF quickly reveals the system’s inherent advantages. Primarily, it offers superior control over individual heating zones, allowing for tailored temperatures and reduced energy waste; The fully pumped primary loop, visible in the diagrams, ensures rapid response times – radiators heat up quicker than in traditional setups.
Furthermore, Y Plan systems minimize boiler cycling, extending its lifespan and improving overall efficiency. PDF documentation highlights the system’s compatibility with advanced controls like smart thermostats and zone valves, enhancing user convenience.
The consistent water flow, clearly illustrated in a Y Plan wiring diagram PDF, contributes to even heat distribution. This results in a more comfortable living environment and potentially lower heating bills. It’s a long-term investment in heating efficiency and control.
Components of a Y Plan System
Y Plan wiring diagram PDFs detail essential parts: a manifold, circulating pump, and thermostatic radiator valves (TRVs). These components work together for efficient heat distribution.
Understanding each element, as shown in the diagrams, is vital for installation and maintenance.
Y Plan Manifold: The Central Hub
Y Plan wiring diagram PDFs prominently feature the manifold, acting as the system’s central distribution point. It receives heated water from the primary loop – typically connected to the boiler – and distributes it to multiple secondary loops serving individual radiators or zones.
These diagrams illustrate how the manifold incorporates ports for the flow and return of each secondary loop, often with integrated balancing valves for precise flow control. Manifolds can vary in size and configuration, depending on the number of heating zones.
PDF schematics clearly show connections for the circulating pump, ensuring consistent water movement throughout the system. High-quality diagrams will also detail isolation valves, allowing for maintenance without shutting down the entire heating system. Understanding the manifold’s role, as depicted in these diagrams, is fundamental to comprehending the entire Y Plan setup.
Circulating Pump: Ensuring Water Flow
Y Plan wiring diagram PDFs consistently highlight the crucial role of the circulating pump. Positioned on the primary loop, typically after the manifold, the pump drives the heated water throughout the entire system, overcoming resistance in the pipework and ensuring efficient heat delivery to all radiators.
These diagrams illustrate the pump’s electrical connections and often specify required voltage and wattage. Proper pump sizing, as indicated in some PDF guides, is vital for optimal performance and energy efficiency.
Detailed diagrams may show the pump’s head pressure characteristics, aiding in correct installation and preventing noise or cavitation. Understanding the pump’s function, as visually represented in these PDF resources, is key to diagnosing and resolving issues like low water pressure or uneven heating. Correct pump operation is fundamental to a functioning Y Plan system.
Thermostatic Radiator Valves (TRVs): Individual Room Control
Y Plan wiring diagram PDFs clearly demonstrate how Thermostatic Radiator Valves (TRVs) enable independent temperature control in each room. These valves, connected to the secondary loops, regulate hot water flow based on the desired room temperature, enhancing comfort and energy savings.
Diagrams illustrate the TRV’s placement on each radiator and its connection to the return pipe. Understanding the TRV settings – from 1 to 5 or similar scales – is crucial for optimal performance, as detailed in some PDF documentation.
These PDF resources often show how TRVs interact with the manifold and circulating pump, ensuring balanced heat distribution. Correct TRV function, as depicted in the diagrams, prevents overheating or underheating, contributing to a more efficient and responsive heating system. Proper installation, guided by these PDFs, is essential.

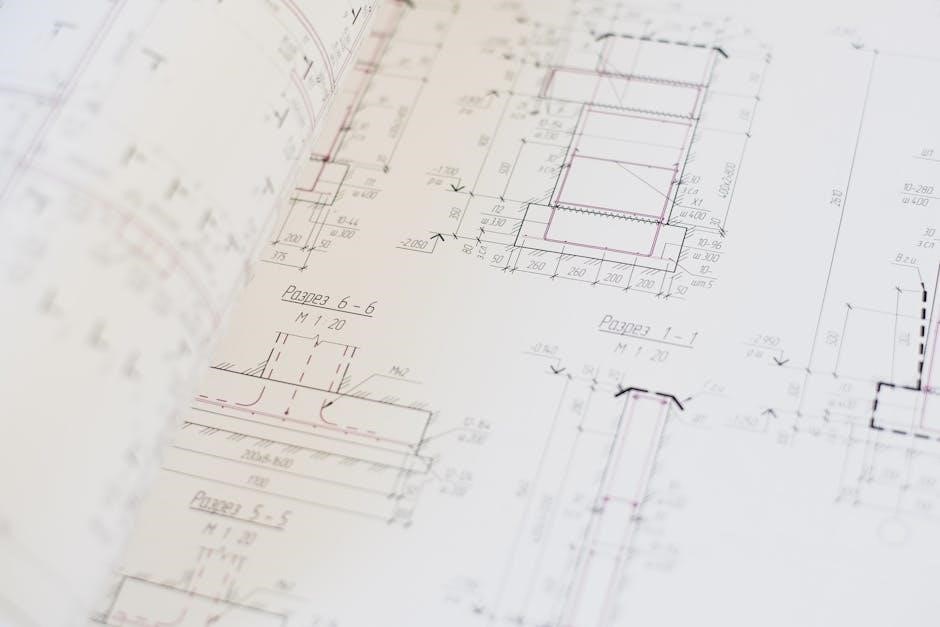
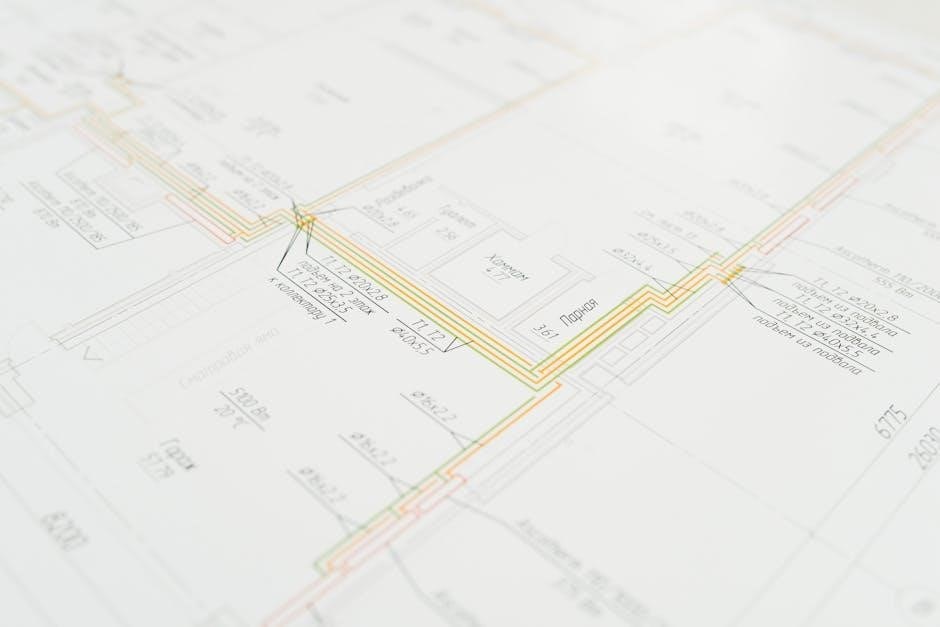
Decoding a Y Plan Wiring Diagram PDF
Y Plan wiring diagram PDFs utilize specific symbols to represent components. Understanding these notations—for pumps, manifolds, and pipes—is key to interpreting the system’s layout and function.
Key Symbols and Notations
Y Plan wiring diagram PDFs employ standardized symbols for clarity. The manifold, central to the system, is often depicted as a rectangular block with multiple ports, representing connections to individual heating zones. A circulating pump is typically shown as a circular or oval shape with arrows indicating water flow direction.
Thermostatic Radiator Valves (TRVs) are represented by symbols illustrating temperature control functionality. Pipes are shown as lines, with different line styles indicating flow and return pipes. Boiler connections are also clearly marked with specific symbols. Understanding these notations is vital for accurate interpretation.
Furthermore, diagrams may include symbols for bypass valves, air vents, and pressure gauges. Consistent use of these symbols across different PDF documents ensures universal comprehension. Familiarizing yourself with these visual cues streamlines the process of understanding the system’s configuration and troubleshooting potential issues.
Identifying the Primary Loop
In a Y Plan wiring diagram PDF, the primary loop is the foundational circuit connecting the boiler to the manifold. It’s typically represented by thicker lines, visually distinguishing it from the secondary loops serving individual radiators. This loop facilitates the continuous circulation of heated water from the boiler throughout the entire system.
The primary loop often includes the circulating pump and bypass valve, crucial components for maintaining consistent water flow and preventing stagnation. Identifying the boiler’s connection points within the primary loop is essential for understanding the system’s overall operation.
Carefully tracing the flow arrows on the diagram will clearly delineate the primary loop’s path. Recognizing this central circuit is the first step in comprehending how heat is distributed to the secondary loops and ultimately, to the radiators within each zone.

Understanding the Secondary Loops
A Y Plan wiring diagram PDF showcases secondary loops branching off the primary loop to supply individual radiators or zones. These loops are typically depicted with thinner lines, differentiating them from the main circulation path. Each secondary loop incorporates a Thermostatic Radiator Valve (TRV), enabling independent temperature control in each room.
The diagram illustrates how the heated water flows from the manifold, through each secondary loop, and then back to the manifold for reheating. Understanding the arrangement of these loops is vital for diagnosing issues like cold radiators or uneven heating.
Tracing each secondary loop from the manifold to its corresponding radiator clarifies the system’s zoning capabilities. Careful examination of the PDF reveals how the Y Plan facilitates efficient and personalized heating throughout the property.

Installation of a Y Plan System
Y Plan installation, guided by a PDF diagram, demands precise pipework planning and manifold/pump connection. TRV installation on radiators is also crucial for optimal performance.
Planning the Pipework Layout
Careful planning, referencing a detailed Y Plan wiring diagram PDF, is paramount before commencing installation. The primary loop, connecting the boiler to the manifold, requires appropriately sized pipes to handle flow rates. Secondary loops, extending from the manifold to individual radiators, must be calculated based on radiator BTU requirements.
Consider pipe material compatibility – copper, PEX, or multilayer – ensuring it aligns with building regulations and boiler specifications. Minimize pipe runs where possible to reduce heat loss and improve system efficiency. The diagram PDF will illustrate optimal routing, avoiding sharp bends that restrict flow.
Accurate measurement and marking of pipework are essential, alongside planning for TRV locations and potential future modifications. Proper insulation of all pipework is vital to prevent heat loss and maintain system performance, as highlighted in many Y Plan wiring diagram PDFs.
Connecting the Manifold and Pump
Referring to your Y Plan wiring diagram PDF, begin by securely mounting the manifold in a readily accessible location. Connect the primary flow and return pipes from the boiler to the designated ports on the manifold, ensuring correct orientation. The circulating pump, also detailed in the PDF, should be installed on the return line, before the manifold, to prevent overheating.
Electrical connections to the pump must adhere to local regulations, including proper grounding and fusing. Utilize compression fittings or appropriate adaptors for secure, leak-proof connections. Bleed the system thoroughly after connecting the pump to remove any trapped air, following the diagram’s guidance.
Double-check all connections for tightness and proper alignment before commissioning the system. A correctly installed manifold and pump, as shown in the PDF, are crucial for efficient heat distribution.
Installing TRVs on Radiators
Consult your Y Plan wiring diagram PDF to identify the secondary loops connected to each radiator. Thermostatic Radiator Valves (TRVs), crucial for individual room control, are installed directly onto the radiator’s return port. Ensure the valve body is compatible with the radiator’s connection thread.
Before installation, isolate the radiator’s water supply to prevent leaks. Apply PTFE tape to the valve threads for a watertight seal. Carefully screw the TRV body onto the radiator, tightening firmly but avoiding over-tightening. The PDF will illustrate the correct orientation for temperature adjustment.
Once installed, test each TRV to confirm proper operation and responsiveness. Correct TRV installation, as depicted in the diagram, optimizes heating efficiency and comfort throughout the home.

Troubleshooting Common Y Plan Issues
Y Plan wiring diagram PDFs are vital for diagnosing problems like low pressure or unresponsive radiators. Referencing these diagrams aids in pinpointing faults within the system.
Low Water Pressure Problems
Low water pressure in a Y Plan system, as illustrated in a Y Plan wiring diagram PDF, often stems from several key areas. Firstly, examine the circulating pump; a diagram will show its location and connections, helping verify correct operation and power supply.
Secondly, inspect the manifold for blocked or partially closed valves – the PDF will detail valve positions. Airlocks within the system are another common cause; bleeding radiators, guided by the diagram’s loop layout, can resolve this.
Furthermore, check the boiler pressure and ensure it’s within the manufacturer’s recommended range. A Y Plan wiring diagram PDF doesn’t directly show boiler settings, but understanding the system’s overall flow helps diagnose pressure issues. Finally, consider scale buildup within the pipes, requiring professional flushing.
Radiator Not Heating Up
When a radiator fails to heat in a Y Plan system, referencing a detailed Y Plan wiring diagram PDF is crucial. Begin by verifying the Thermostatic Radiator Valve (TRV) is correctly set and not stuck. The diagram illustrates TRV locations on each secondary loop.
Next, check for blockages within the radiator itself; sludge buildup is a frequent culprit. A PDF diagram won’t show internal blockages, but understanding the flow path aids diagnosis. Ensure the manifold valve controlling that specific radiator’s secondary loop is fully open – the diagram highlights these valves.
Air trapped within the radiator can also prevent heating; bleeding the radiator, guided by the diagram’s loop layout, is essential. Finally, confirm the circulating pump is functioning correctly, as shown in the PDF, to ensure adequate water flow.
Pump Noise and Vibration
Excessive noise or vibration from the circulating pump in a Y Plan system warrants investigation, aided by a Y Plan wiring diagram PDF. The diagram confirms proper pump installation and pipework support. Loose mounting bolts are a common cause; tighten them securely.
Air trapped within the pump housing can generate noise; bleeding the system, referencing the PDF’s primary loop illustration, is vital. Check for cavitation, often caused by insufficient inlet pressure – the diagram shows the pump’s position relative to the boiler and manifold.
Verify the pump isn’t directly connected to rigid pipework without vibration isolators. A PDF diagram won’t depict isolators, but understanding best practices is key. Finally, bearing wear within the pump itself may necessitate replacement, guided by the diagram for component identification.
Resources for Y Plan Wiring Diagrams
Y Plan wiring diagram PDFs are readily available online through dedicated databases and manufacturer websites. Consulting a professional heating engineer provides expert guidance.
Online Diagram Databases
Numerous online platforms host extensive collections of Y Plan wiring diagram PDFs, catering to diverse system configurations. These databases often allow users to search by manufacturer, boiler model, or specific component types, streamlining the process of finding relevant documentation.
Websites specializing in heating and plumbing schematics frequently feature user-submitted diagrams, offering a broader range of examples. However, verifying the accuracy of these user-generated resources is crucial before relying on them for installation or troubleshooting. Always cross-reference with official manufacturer documentation whenever possible.
Dedicated forums and online communities focused on heating systems also serve as valuable repositories of Y Plan wiring diagrams. Experienced installers and homeowners often share their knowledge and diagrams within these forums, providing practical insights and solutions to common issues. Remember to critically evaluate the information and prioritize safety.
Before downloading any PDF, ensure the source is reputable and the diagram is clearly legible and complete. A well-structured diagram should include all essential components, proper labeling, and clear indications of pipework connections.
Manufacturer’s Documentation
The most reliable source for Y Plan wiring diagram PDFs is directly from the boiler and manifold manufacturers. These documents are specifically tailored to their products, ensuring accuracy and compatibility. Most manufacturers provide downloadable PDF manuals on their official websites, often within a dedicated support or downloads section.
These diagrams typically include detailed schematics, component lists, and installation instructions, covering all aspects of the Y Plan system. They often feature clear labeling and standardized symbols, making them easier to interpret. Always prioritize manufacturer documentation over generic online resources.
When searching for PDFs, use the exact model number of your boiler and manifold to ensure you obtain the correct diagram. Some manufacturers may require registration or account creation to access their documentation. Retaining these PDFs is vital for future maintenance and troubleshooting.
Manufacturer’s guides often include safety warnings and best practices, crucial for a safe and efficient installation.
Professional Heating Engineer Assistance
Interpreting a Y Plan wiring diagram PDF can be complex, especially for those unfamiliar with central heating systems. Engaging a qualified heating engineer is highly recommended for installation, modification, or troubleshooting. Professionals possess the expertise to accurately decipher diagrams and ensure safe, compliant work.
A heating engineer can verify the suitability of a Y Plan system for your property and provide a customized installation plan. They can also identify potential issues and offer solutions based on the specific PDF diagram and system components. Don’t hesitate to seek their guidance if you encounter difficulties.
They can also advise on the latest regulations and best practices, ensuring your system operates efficiently and safely. Utilizing a professional minimizes the risk of errors and costly repairs. Always prioritize safety and compliance when working with heating systems and PDF schematics.

Y Plan vs. Other Wiring Systems
Y Plan systems, visualized in PDF diagrams, differ from S Plans and microbubble setups in heat distribution methods. Diagrams highlight unique loop configurations for optimal efficiency.
Choosing the right system depends on property size and heating demands, as shown in comparative PDF guides.
Y Plan vs. S Plan
Y Plan and S Plan systems, both detailed in accessible PDF wiring diagrams, represent common central heating configurations, yet differ significantly in their operational approach. The key distinction lies in how the circulating pump interacts with the primary heating loop.
In a Y Plan, the pump is always active on the primary loop, continuously circulating hot water to the manifold, even when only a single zone demands heat. PDF diagrams clearly illustrate this constant circulation. Conversely, an S Plan utilizes a two-port valve to switch the pump on only when a zone calls for heating, conserving energy.
PDF comparisons reveal that Y Plans generally offer faster response times to heating requests due to the pre-heated water readily available. However, S Plans are often favored for their energy efficiency, as the pump isn’t running unnecessarily. Examining detailed wiring diagrams helps visualize these differences and determine the best fit for a specific property.
Y Plan vs. Microbubble Systems
Comparing Y Plan systems, as depicted in detailed PDF wiring diagrams, with microbubble systems reveals fundamental differences in their approach to central heating control and efficiency. Microbubble systems, a more recent innovation, utilize a primary loop with a very low flow rate and specialized air microbubbles to transport heat.

PDF schematics of Y Plans showcase a traditional setup with a circulating pump maintaining consistent flow through the primary loop and manifold. Microbubble systems, conversely, rely on the buoyancy of the microbubbles to distribute heat, often eliminating the need for a powerful circulating pump. This results in significant energy savings.
While Y Plan wiring diagrams demonstrate a relatively straightforward installation, microbubble systems require specialized components and careful commissioning. PDF guides for microbubble systems emphasize the importance of proper air introduction and maintenance. The choice depends on budget, efficiency goals, and installation expertise.
Choosing the Right System for Your Needs
Selecting between a Y Plan, detailed in comprehensive PDF wiring diagrams, and alternative systems requires careful consideration of your home’s heating demands and existing infrastructure. Y Plans are well-suited for larger properties with multiple radiators and zones, offering individual room control via TRVs, as illustrated in the PDF schematics.
Reviewing a Y Plan wiring diagram PDF helps assess compatibility with your boiler and pipework. If energy efficiency is paramount, explore microbubble systems, though they demand specialized installation. Consider the initial cost versus long-term savings.
For simpler systems or retrofits, a Y Plan offers a balance of performance and affordability. Thoroughly examine PDF guides to understand installation complexities and potential troubleshooting. Ultimately, consulting a qualified heating engineer is crucial for making an informed decision tailored to your specific needs.