
This guide provides an essential introduction to Stealth Cam setup, covering key steps for optimal performance, image quality, and successful wildlife monitoring experiences.
1.1 Overview of Stealth Cam Technology
Stealth Cam technology combines advanced features like motion sensors, night vision, and wireless connectivity for effective wildlife monitoring. These cameras utilize infrared LEDs for nocturnal captures and PIR sensors for motion detection. They offer customizable settings, including resolution, trigger speed, and multi-shot modes. Remote monitoring via mobile apps enables real-time access to footage. Designed for durability and discretion, Stealth Cams are ideal for surveillance in various environments, ensuring high-quality images and videos with minimal intrusion. Their robust design and user-friendly interface make them a popular choice for outdoor enthusiasts and professionals alike.
1.2 Importance of Proper Setup
Proper setup is crucial for maximizing the performance and reliability of your Stealth Cam. Correct installation ensures optimal image quality, motion detection accuracy, and battery life. Improper setup can lead to missed captures, blurry images, or even device malfunction. By following the setup guide, you can avoid common issues and ensure your camera functions as intended. Proper placement, configuration of settings, and maintenance are key to achieving reliable results and capturing high-quality footage for wildlife monitoring or security purposes.

Initial Setup and Preparation
Unpacking and inventorying components, followed by battery installation and SD card setup, ensures your Stealth Cam is ready for initial power-on, proper functionality, and optimal performance.
2.1 Unpacking and Inventory of Components
Begin by carefully unpacking your Stealth Cam and inventorying all included components. Typically, this includes the camera body, mounting straps, batteries, an SD card, and additional accessories depending on the model. Ensure all items are accounted for to avoid missing essential parts. Organize the components neatly to streamline the setup process. Verify the condition of each item to ensure no damage occurred during shipping. This step ensures you’re fully prepared for the initial setup and avoids potential delays or issues down the line.
2.2 Battery Installation and Power Management
Insert the batteries into the designated compartment, ensuring correct polarity to avoid damage. Use high-quality, name-brand AA batteries for optimal performance. Avoid rechargeable batteries, as their voltage fluctuations may affect functionality. Check the battery level indicator on the LCD screen to monitor power status. Replace batteries when the indicator shows low power. For extended use, consider using a solar panel to supplement power, especially in sunny areas. Proper battery management ensures reliable operation and minimizes downtime during critical monitoring periods.
2.3 SD Card Installation and Formatting
Insert a high-quality Class 10 SD card into the designated slot to ensure optimal performance and storage reliability. Format the SD card using the camera’s menu to prepare it for storing images and videos. Ensure the card is compatible with your camera’s maximum capacity, typically up to 32GB, to avoid storage issues. Formatting ensures proper file organization and prevents data corruption, crucial for maintaining clear and accessible recordings. Using an incompatible or unformatted card may lead to reduced performance or failed recordings, emphasizing the importance of this step.
2.4 Understanding Camera Components
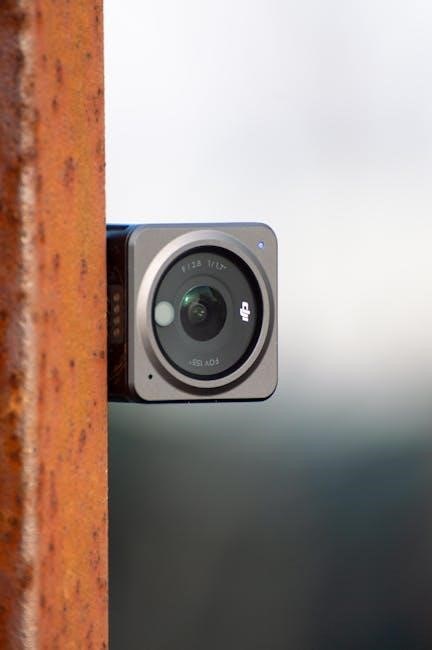
Familiarizing yourself with the camera’s components is essential for effective use. The lens captures images, while the infrared LEDs illuminate nighttime scenes without detection. The motion sensor (PIR) detects movement, triggering captures. External ports allow for additional accessories, and buttons provide menu navigation. Understanding these elements helps optimize placement and functionality, ensuring proper operation and capturing high-quality images. Knowledge of each component’s role enhances setup efficiency and overall performance, making it a critical step in the initial configuration process.
2.5 Initial Power-On and Basic Menu Navigation
After installing batteries and the SD card, power on your Stealth Cam to begin the setup process. The LCD screen will display the camera’s status, guiding you through initial diagnostics. Use the control buttons to navigate the menu system, starting with essential settings like date/time and camera ID. Familiarize yourself with key options such as image resolution, video length, and motion detection sensitivity. Carefully review and configure these settings to meet your monitoring needs before proceeding. Always save settings to ensure proper functionality.
Customizing Your Stealth Cam Settings
Customizing your Stealth Cam settings allows you to tailor functionality to your needs, including adjusting motion sensitivity, resolution, and time-lapse intervals for optimal performance.
3.1 Navigating the Settings Menu
Accessing the settings menu on your Stealth Cam is straightforward. Use the camera’s control buttons or dial to navigate through options like image resolution, video length, and motion sensitivity. Each setting is labeled clearly, allowing you to customize functionality based on your needs. Save your preferences to ensure they are applied correctly. Refer to the camera’s manual for detailed explanations of each option, ensuring optimal configuration for wildlife monitoring or security purposes. Proper navigation and customization enhance performance and image quality significantly.
3.2 Adjusting Image and Video Resolution
Adjusting the image and video resolution on your Stealth Cam allows you to balance quality and storage needs. Higher resolutions, such as 12MP for images or 1080p for videos, provide detailed captures but consume more memory. Lower settings, like 8MP or 720p, save storage space while still delivering clear results. Access these options in the settings menu and select based on your priorities. Saving your preferred resolution ensures consistent image quality across all captures, optimizing your wildlife monitoring or security efforts. Proper adjustment enhances clarity and efficiency.
3.3 Configuring Motion Sensor Sensitivity
Configuring the motion sensor sensitivity on your Stealth Cam is essential for optimizing detection accuracy. Higher sensitivity increases the likelihood of capturing wildlife but may result in false triggers from wind or small animals. Lower sensitivity reduces false alarms but might miss distant or subtle movement. Access this setting in the camera’s menu, typically under motion detection or PIR settings. Experiment with different levels to find the ideal balance for your environment. Testing the sensor by moving in front of the camera helps verify its responsiveness. Save your preferred sensitivity level to ensure consistent performance during monitoring. Proper adjustment enhances accuracy and minimizes unwanted recordings. This step is critical for reliable and efficient wildlife or security monitoring. Always review your settings before deployment to avoid missing important captures. Adjustments may vary depending on the camera’s placement and surrounding conditions. Regularly check and refine sensitivity to adapt to changing environments or seasonal activity patterns. This ensures your Stealth Cam operates at peak effectiveness, delivering clear and relevant results; Proper calibration is key to maximizing your camera’s potential and achieving your monitoring goals. By fine-tuning sensitivity, you can capture the footage that matters most while reducing unnecessary data. This feature is a cornerstone of effective camera setup and usage, making it a critical step in your configuration process. Always refer to your camera’s manual for specific guidance on adjusting sensitivity settings. Remember, optimal sensitivity ensures you capture the right moments without compromising storage or battery life. Tailoring this setting to your specific needs is vital for a seamless and successful monitoring experience.
3.4 Setting Time Lapse and Burst Mode
Configure Time Lapse and Burst Mode to enhance your monitoring experience. Time Lapse captures images at set intervals, ideal for observing long-term activity patterns. Burst Mode takes multiple shots in quick succession, ensuring you don’t miss fast-moving subjects. Access these settings in the camera’s menu, typically under advanced capture options. Adjust the interval for Time Lapse or the number of images per trigger in Burst Mode. Experiment with these features to balance storage usage and capture frequency. Save your settings to optimize performance for your specific monitoring needs. These modes add flexibility to your camera’s operation, ensuring you capture the moments that matter most. Regularly review and adjust these settings to adapt to changing conditions or target activity levels. Proper configuration of these features is key to maximizing your camera’s effectiveness and achieving your monitoring goals. Always ensure settings align with your storage capacity and battery life expectations. This step is crucial for tailored and efficient image capture. Use these modes to enhance your wildlife or security monitoring strategy.
3.5 Enabling Date/Time Stamps
Enable date/time stamps to add accurate timestamps to your images and videos. This feature is essential for organizing and authenticating your recordings. Navigate to the camera’s settings menu and locate the date/time option. Enter the current date and time manually or enable automatic synchronization if your camera supports GPS. Once set, the camera will embed this information into each capture. This feature is particularly useful for tracking wildlife patterns or monitoring security events. Ensure the date and time are correctly configured to maintain precise records. This step enhances the utility of your captured data for future reference. Proper setup ensures clarity and accuracy in your monitoring efforts.

Mounting and Placement Strategies
Proper mounting and placement ensure stability and a clear field of view. Use sturdy brackets or straps for secure installation and adjust angles for optimal coverage.
4.1 Choosing the Optimal Location
Selecting the right location is critical for effective wildlife monitoring. Position the camera near game trails, food sources, or watering holes to maximize wildlife activity capture. Mount the camera at a height of 3-5 feet to avoid false triggers and ensure a clear field of view. Avoid areas with heavy vegetation or obstructions that could block the lens. Consider the sun’s position to prevent glare and ensure evenly lit photos. Experiment with angles to capture the best perspective, and test multiple locations before finalizing placement for optimal results.
4.2 Mounting Options and Stability

Ensure your Stealth Cam is securely mounted using options like tree straps, tripods, or clips. Tree straps are ideal for wrapping around trees, while tripods offer flexibility on flat surfaces. For maximum stability, tighten all straps or screws firmly to prevent movement. Use a level to ensure the camera is balanced and even. Reinforce mounts in windy or high-traffic areas to avoid displacement. Choose durable, weather-resistant materials for long-term reliability. A stable setup guarantees sharp images and consistent performance, making it essential for effective wildlife monitoring and security applications.
4.3 Ensuring Clear Field of View
A clear field of view is essential for capturing high-quality images and videos. Position the Stealth Cam to avoid obstructions like branches, leaves, or tall grass. Ensure the camera is angled correctly to cover the desired area without tilting too far upward or downward. Test the setup by walking through the frame to confirm motion detection coverage. Clearing debris and trimming nearby vegetation can enhance visibility; A well-planned field of view ensures accurate triggering and sharp imagery, maximizing your wildlife monitoring or security efforts. Regularly inspect and adjust the camera to maintain optimal visibility over time.
4.4 Testing Camera Placement
Testing your Stealth Cam placement is crucial for ensuring optimal performance. Activate the test mode to verify motion detection accuracy and image capture functionality. Walk through the camera’s field of view to observe the LED indicator, confirming proper triggering. Check the LCD screen to ensure images are clear and well-framed. Adjust the camera’s angle or position if necessary to eliminate obstructions or improve coverage. Test both daytime and nighttime conditions to confirm infrared functionality and image clarity. This step ensures your camera is ready to capture high-quality footage without missing critical moments. Regular testing helps refine placement for better results.

Troubleshooting Common Issues
This section addresses common issues like power failures, SD card errors, and motion detection problems. It provides practical solutions to ensure your camera operates smoothly.
5.1 Checking Power and Battery Life
Ensure your Stealth Cam is powered on and batteries are fresh. Check the battery level indicator on the LCD screen for low power alerts. Replace batteries promptly when indicated. Install high-quality, name-brand AA batteries, avoiding rechargeables due to voltage fluctuations. Verify proper battery installation, following polarity guidelines to prevent damage. Clean battery terminals with a soft cloth to maintain good contact. For extended use, consider a solar panel accessory. Regular monitoring ensures continuous operation and prevents missed captures due to power loss. Always carry spare batteries for quick replacements in the field.

5.2 Resolving SD Card Errors
If your Stealth Cam displays an SD card error, first ensure the card is properly inserted and formatted. Use a Class 10 SD card (up to 32GB) as recommended. Format the card directly in the camera or via a computer to resolve formatting issues. Check for physical damage or corruption by inserting the card into a computer and running disk utility tools. Replace the card if errors persist. Always use high-quality SD cards to prevent data loss and ensure reliable performance. Regular formatting helps maintain optimal functionality and storage capacity.
5.3 Addressing Motion Detection Problems
If your Stealth Cam isn’t detecting motion accurately, start by adjusting the PIR sensitivity settings. Higher sensitivity may reduce missed triggers but could increase false detections. Ensure the camera’s motion sensor is clean and free from debris. Verify that the camera is positioned to cover the desired area without obstructions. Test the sensor by moving in front of it to see if the indicator light activates. If issues persist, consult the manual for advanced settings or reset the camera to factory defaults. Proper calibration ensures reliable motion detection for accurate wildlife monitoring.
5.4 Dealing with Image Clarity Issues
If your Stealth Cam captures blurry or unclear images, start by cleaning the lens with a soft cloth to remove dirt or smudges. Ensure the camera is properly focused and adjust the settings if necessary. Check for obstructions like branches or leaves in the field of view. Verify the SD card is of high quality and properly formatted. If issues persist, ensure the camera is securely mounted to avoid movement. Adjusting the camera angle or repositioning it may also improve image clarity for sharper, more defined results.
5.5 Cellular Connectivity Troubleshooting
For cellular connectivity issues, first ensure a strong signal in your area. Verify your data plan is active and sufficient for image transmission; Restart the camera and mobile app to reset the connection. Check if the SIM card is properly installed and compatible with your Stealth Cam model. Ensure the camera’s firmware is up to date, as outdated software can disrupt connectivity. If issues persist, reset the camera to factory settings or contact Stealth Cam support for further assistance. Always confirm signal strength before deployment for reliable performance.
Advanced Features and Functionality
Explore advanced features like remote monitoring, firmware updates, and time-lapse photography to enhance your Stealth Cam experience. These tools optimize performance and expand monitoring capabilities effectively.
6.1 Remote Monitoring via Mobile App
Remote monitoring via the Stealth Cam COMMAND app allows you to access your camera settings and view live footage from your smartphone or tablet. Download the app from the App Store or Google Play, create an account, and pair your camera for real-time monitoring. Adjust settings like resolution, video length, and motion sensitivity directly through the app. Receive notifications for low battery, full SD cards, or other alerts. This feature eliminates the need to retrieve the SD card, enabling convenient and efficient wildlife monitoring. Ensure a stable internet connection for seamless functionality.
6.2 Firmware Updates and Maintenance
Regular firmware updates are essential for optimizing your Stealth Cam performance. Check the manufacturer’s website or use the Stealth Cam COMMAND app to find the latest updates for your model. Download the update file and transfer it to your camera’s SD card. After installing, restart the camera to apply changes. Always back up your photos and videos before updating to avoid data loss. Updates often include bug fixes, new features, and performance improvements. Regular maintenance ensures compatibility with new accessories and prevents functionality issues. Stay updated for the best camera experience.
6.3 Utilizing Time-Lapse Photography
Time-lapse photography allows you to capture images at set intervals, ideal for monitoring long-term activity without constant motion detection. Configure this feature via the settings menu, selecting intervals ranging from minutes to hours. This mode is perfect for observing patterns like animal behavior or seasonal changes. Combine time-lapse with burst mode for detailed captures. Note that frequent use may reduce battery life and storage capacity. Adjust intervals based on your needs to balance image quality and resource usage. This feature enhances your ability to monitor and analyze wildlife activity effectively.
6.4 Managing Data and Recordings
Efficiently managing your Stealth Cam data ensures you can easily access and organize your captured images and videos. Retrieve recordings by removing the SD card and inserting it into a computer or compatible device. Organize files by date, location, or event using file management software. Regularly back up your data to an external hard drive or cloud storage to prevent loss; For cellular models, use the app to remotely download recordings, eliminating the need for physical card retrieval. Format SD cards periodically to maintain optimal performance and prevent storage errors. Always use high-quality cards to ensure reliable data transfer and storage.

Performance Optimization Tips
Optimize your Stealth Cam’s performance by focusing on strategic placement, effective battery management, and regular hardware maintenance to ensure clear imagery and reliable operation.
7.1 Strategic Camera Placement
Strategic placement is key to maximizing your Stealth Cam’s effectiveness. Position the camera at a height of 3-5 feet to avoid false triggers and capture clear images. Consider wildlife movement patterns and ensure a clear field of view, free from obstructions like branches or tall grass. Experiment with angles to find the best perspective for unobstructed shots. Use tree mounts or secure attachments to stabilize the camera and prevent movement. Test different locations and angles before final placement to optimize results and minimize unwanted detections.
7.2 Managing Battery Life Effectively
Maximizing battery life is crucial for uninterrupted Stealth Cam operation. Use high-quality, name-brand AA batteries for reliable performance. Avoid rechargeable batteries, as voltage fluctuations may affect functionality. Ensure batteries are fresh and correctly installed. Monitor the battery level indicator on the LCD screen and replace batteries when needed. Adjust settings like resolution and video length to reduce power consumption. Consider using a solar panel for supplementary power in sunny areas. Regular checks and maintenance ensure your camera remains operational, capturing essential wildlife moments without interruption.
7.3 Maintaining Camera Hardware
Regularly clean the lens and camera body with a soft, damp cloth to ensure clear images. Avoid harsh chemicals or abrasive materials that could damage surfaces. Check for debris or moisture in the lens and sensor areas, as these can compromise image quality. Secure the camera firmly using sturdy mounts to prevent movement or damage. Protect the device from extreme weather conditions by using weatherproof cases or shields. Inspect and clean the infrared LEDs and motion sensor regularly to maintain optimal detection accuracy. Proper hardware care ensures durability and consistent performance for your Stealth Cam.

Regular Maintenance and Care
Regular maintenance ensures optimal performance and longevity. Check for firmware updates, clean components, and secure all parts. Protect from environmental damage to maintain functionality.
8.1 Cleaning the Camera and Lens
Regular cleaning is essential for maintaining image clarity and overall performance. Use a soft, dry microfiber cloth to gently wipe the lens and camera exterior. Avoid harsh chemicals or abrasive materials, as they may damage the lens coating or housing. For stubborn smudges, lightly dampen the cloth with distilled water, but ensure no moisture enters the camera. Clean the lens after exposure to dust, rain, or extreme conditions. This prevents debris from affecting image quality and ensures sharp, clear photos. Regularly inspect and clean the camera to maintain optimal functionality and durability.
8.2 Updating Firmware Regularly
Regularly updating your Stealth Cam firmware is crucial for optimal performance and accessing new features. Check the manufacturer’s website or app for the latest version compatible with your model. Download the update file and transfer it to the camera’s SD card using a USB connection or the app’s update feature. Always back up your photos and videos before installing updates to prevent data loss. After updating, restart the camera and verify that all settings are retained. Regular updates ensure compatibility with new accessories and improve functionality, while neglecting updates may lead to decreased performance or compatibility issues.
8.3 Organizing and Backing Up Data
Organizing and backing up your Stealth Cam data is essential for efficient management and preserving your recordings. Transfer images and videos to a computer or external hard drive, organizing files by date, location, or event. Use high-quality storage devices to ensure reliability. For added security, consider uploading your media to cloud storage services; Regularly format your SD card to maintain optimal performance, but always back up important data first. This ensures your wildlife monitoring efforts are well-documented and easily accessible for future reference or analysis.
Mastering your Stealth Cam setup ensures successful wildlife monitoring. This guide has provided expert tips for optimal performance, helping you capture stunning images and stay informed.
9.1 Summary of Key Setup Steps
Setting up your Stealth Cam involves several critical steps to ensure optimal performance. Begin by unpacking and inventorying all components, then install batteries and an SD card. Familiarize yourself with the camera’s features and power it on to access the menu. Customize settings like resolution, motion sensitivity, and time-lapse intervals. Securely mount the camera in a strategic location with a clear field of view. Test the setup to ensure functionality and adjust as needed. Proper preparation and customization are key to capturing high-quality images and videos effectively.
9.2 Final Tips for Successful Monitoring
For successful monitoring, regularly inspect your Stealth Cam and ensure batteries are fresh. Check SD cards for sufficient storage and format them periodically. Maintain a clear field of view by trimming foliage and cleaning the lens. Test camera functionality after setup changes to confirm proper operation. Experiment with sensitivity settings to minimize false triggers while capturing desired activity. Strategic placement and angle adjustments can significantly improve image quality. By following these tips, you’ll maximize your camera’s performance and achieve exceptional wildlife monitoring results.

Additional Resources
Visit the official Stealth Cam website for user manuals, setup guides, and troubleshooting tips. Contact customer support for assistance or to explore advanced features and updates.
10.1 Accessing User Manuals and Guides
Access comprehensive user manuals and guides for your Stealth Cam via the official website or mobile app. These resources provide detailed setup instructions, troubleshooting tips, and model-specific information. Manuals include sections like quick setup guides, camera overviews, and advanced configuration steps. Visit the support section to download PDF manuals for current and discontinued models. Additionally, firmware update guides and troubleshooting FAQs are available to ensure optimal performance. For further assistance, contact Stealth Cam support directly for personalized help or clarification on specific features.
10.2 Stealth Cam Support and Contact
For personalized assistance, contact Stealth Cam support directly via phone, email, or live chat. Their team provides expert help with setup, troubleshooting, and advanced features. Visit the official website for a detailed support page, featuring FAQs, repair services, and warranty information. Additionally, online forums and community resources offer peer-to-peer advice and shared experiences. Whether you’re resolving technical issues or seeking optimization tips, Stealth Cam ensures comprehensive support to maximize your camera’s potential and enhance your monitoring experience.